First setup
User guide › First setup
The setup opens the first time you start OrthoStreamXP. It has six steps and takes a minute or two. Use Next and Back to move between the steps; nothing is saved until you click Finish.
You can run it again later from Settings › Run the setup again. A second run starts from your current settings, and Cancel leaves them unchanged.
1. Welcome
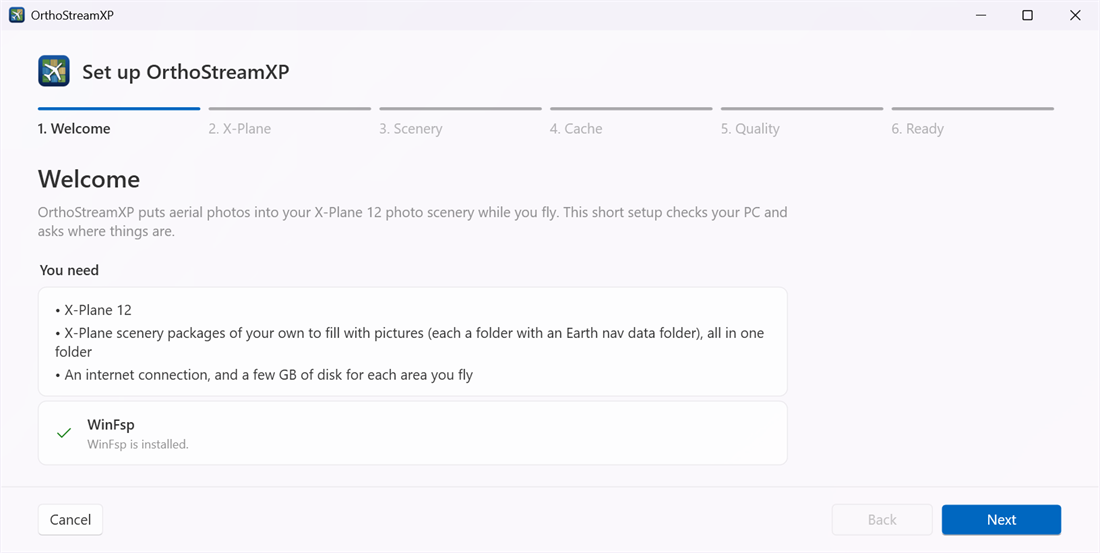
This step lists what you need and checks for WinFsp.
- A green tick with WinFsp is installed means you can continue.
- If WinFsp is missing, click Get WinFsp and install it. Then restart your computer and open OrthoStreamXP again: WinFsp works only after a restart.
2. X-Plane
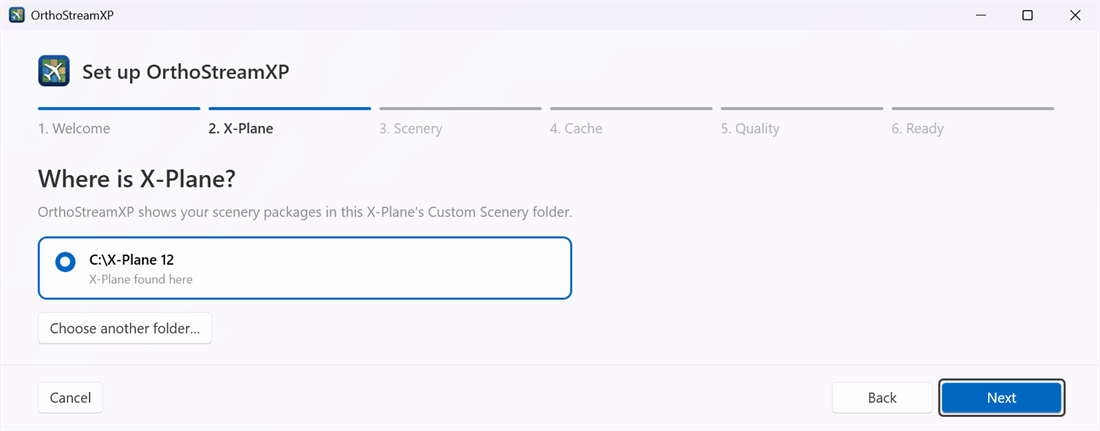
OrthoStreamXP looks for X-Plane 12 on your PC and offers every installation it finds. Pick the one you fly with.
If yours is not listed, click Choose another folder… and choose the folder that contains X-Plane.exe. That folder must also have a Custom Scenery folder.
3. Scenery
OrthoStreamXP adds the photos to scenery packages: the ground of an area, the shape of the terrain cut in 1° squares. There are two ways to get them.
Option 1: download a region in OrthoStreamXP
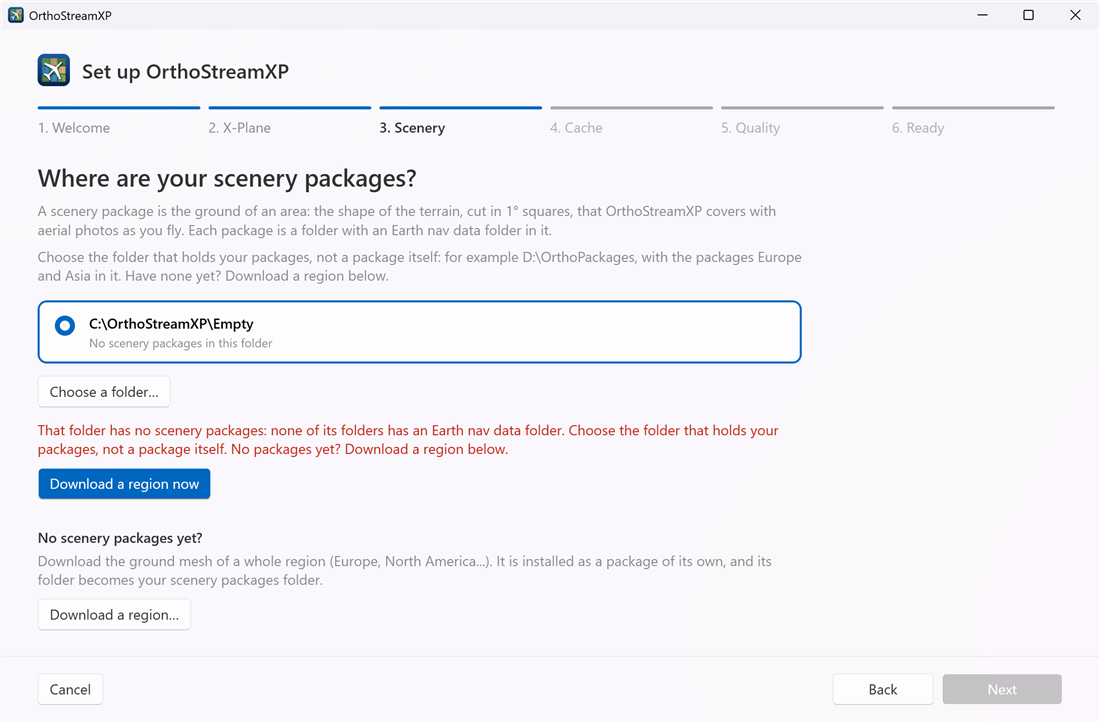
The simplest way, if you have no scenery packages yet. Under No scenery packages yet?, click Download a region…. If you already chose a folder without packages, the hint turns red and Download a region now opens the same list.
The list of regions opens: click Install next to the region you fly in. The progress shows under it, and you can stop and resume the download. When it finishes, the region's folder is chosen as your scenery packages folder and Next becomes available.
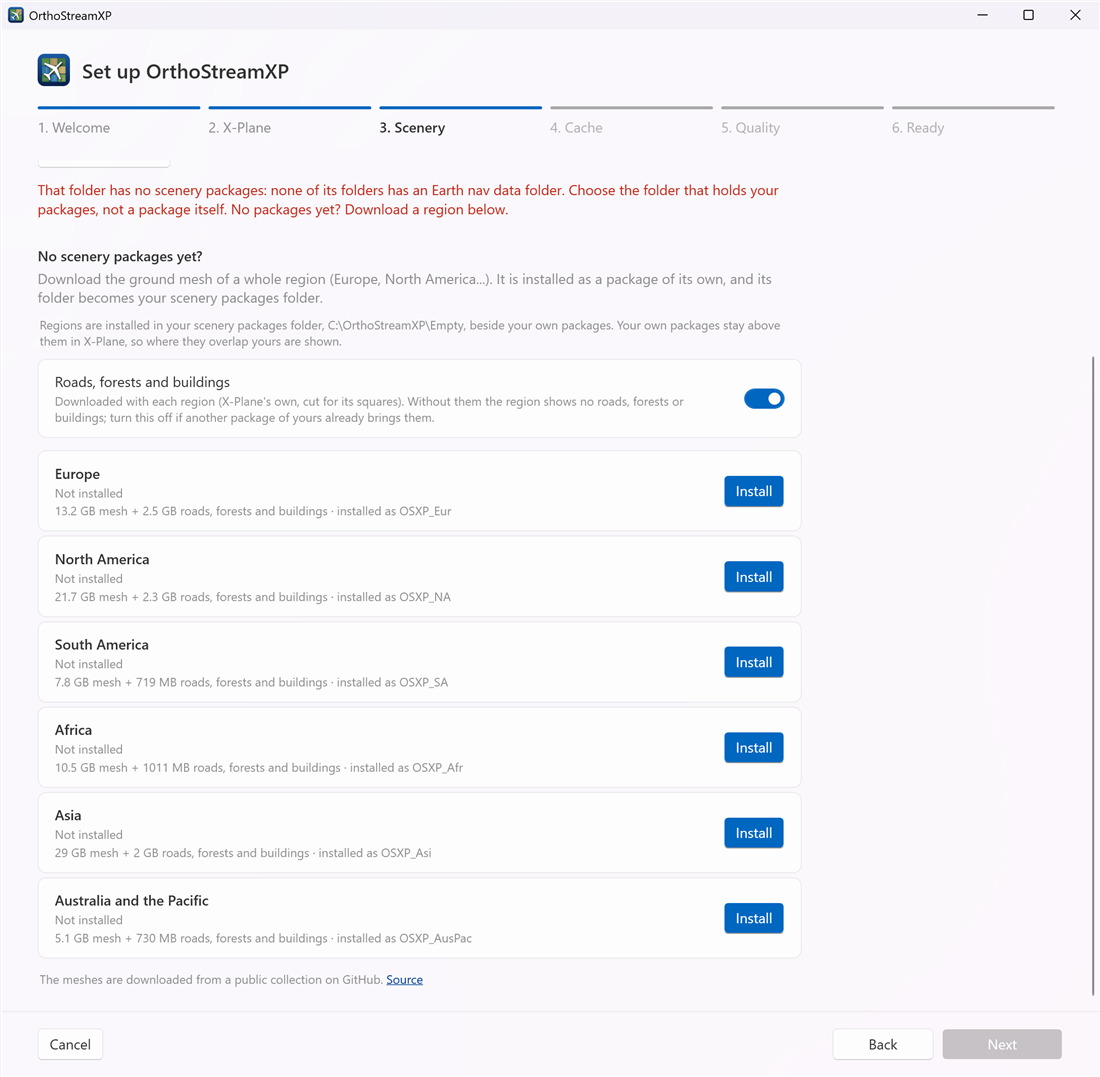
See Packages for the sizes, the roads, forests and buildings, and how to update or delete a region later. You can download more regions at any time on the Packages page.
Option 2: use your own scenery packages
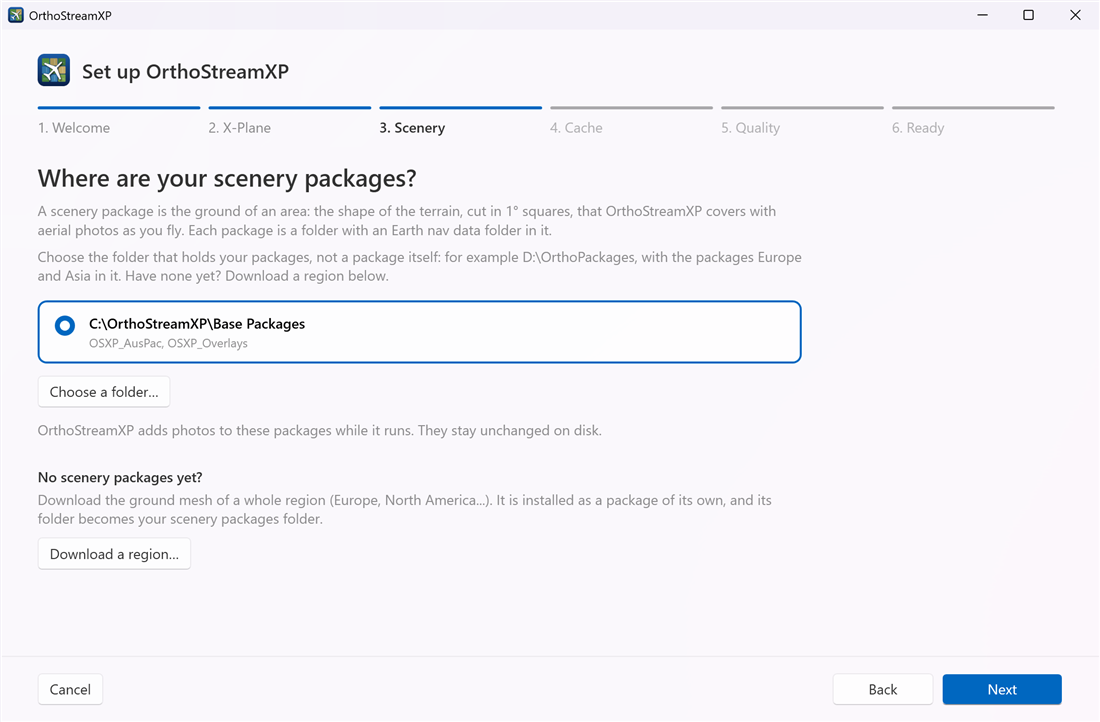
Click Choose a folder… and pick the parent folder (in the example below it's "OrthoPackages") that holds your scenery packages, not one of the packages (not "Europe" or "Asia"). Below the folder, OrthoStreamXP lists the packages it found.
In this example you have to specify the "OrthoPackages" folder as a Scenery packages folder in the application. Keep in mind the "OrthoPackages" here is just for example it can be whatever folder you have. Don't put your scenery packages to the "X-Plane 12/Custom Scenery" - it has to be out of it somewhere on you PC
D:\OrthoPackages\
    Europe\
        Earth nav data\
        terrain\
        ...
    Asia\
        Earth nav data\
        ...
- Keep packages from different tools (Ortho4XP, OrthoStudio XP...) in separate folders, and keep them apart from regions downloaded in OrthoStreamXP: see Packages › One folder per source.
- Your packages stay unchanged on disk. While OrthoStreamXP runs, they appear in X-Plane's
Custom Sceneryfolder with the photos added. When it stops, they disappear from there again. - If the hint turns red, That folder has no scenery packages, you probably picked one package instead of the folder that holds them: check that each package has an
Earth nav datafolder inside it. - If X-Plane's
Custom Sceneryalready contains a folder with the same name as one of your packages, you get a warning. Usually another streaming tool still shows that package there; close that tool before you start OrthoStreamXP and check your scenery_packs.ini file.
4. Cache
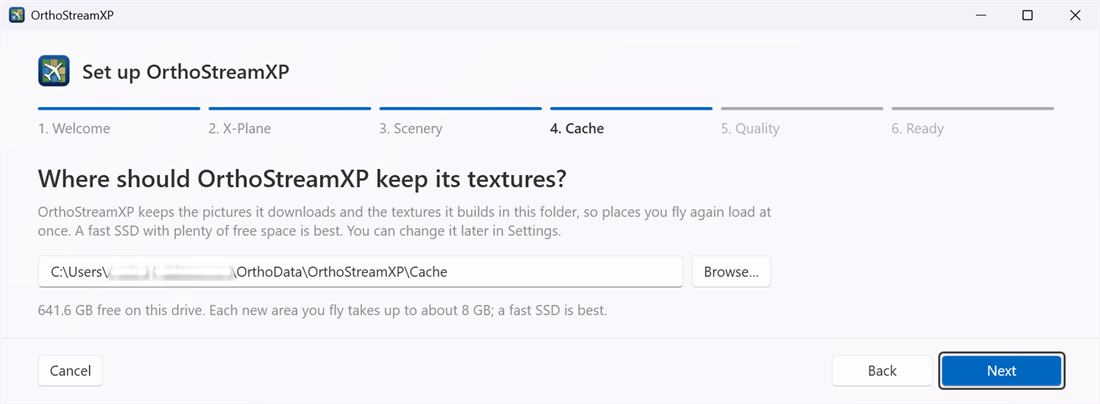
This is where OrthoStreamXP keeps the pictures it downloads and the textures it builds, so areas you fly again load at once.
- Click Browse… or type a full path, such as
D:\OrthoStreamXP\Cache. - Choose a folder on a fast SSD with plenty of free space. The page shows how much space is free on that drive. Each new 1° × 1° area takes up to about 2 GB at Balanced, 8 GB at Sharp and 30 GB at Ultra or Extra.
- You can change the folder or set a size limit later on the Cache page.
5. Quality
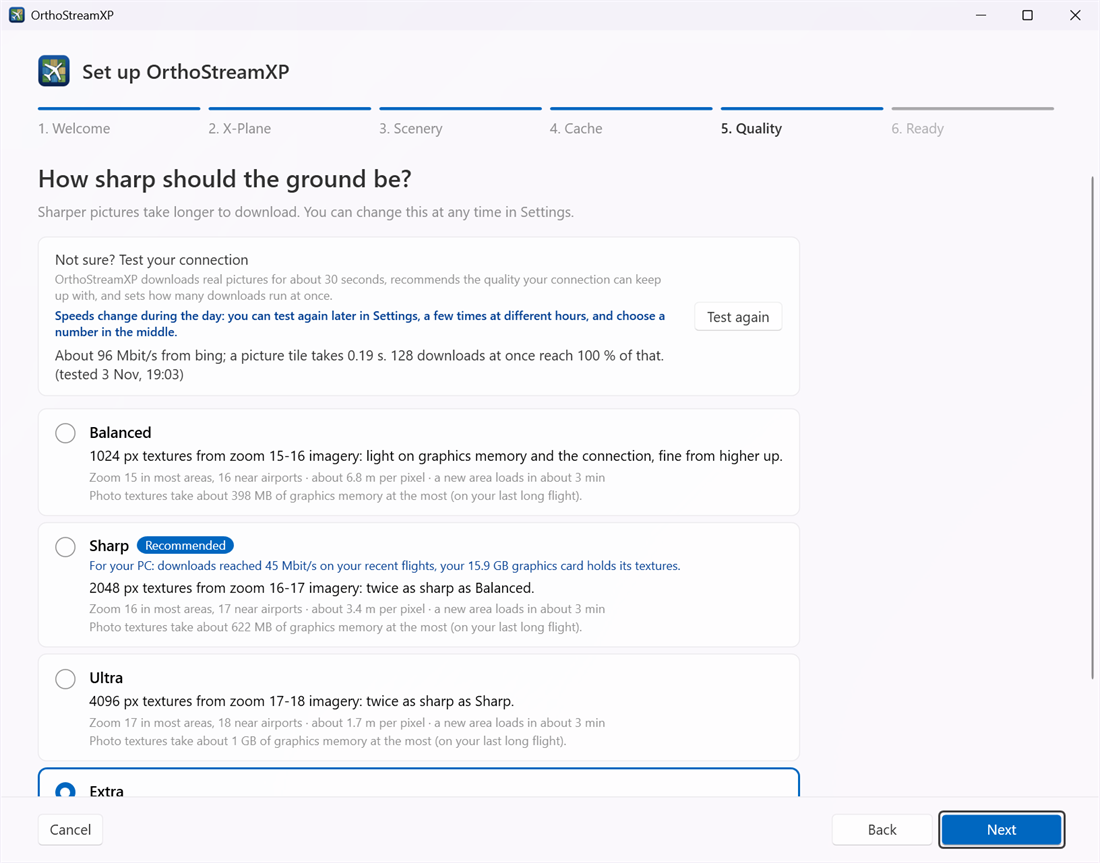
Pick how sharp the ground should be: Balanced, Sharp, Ultra or Extra. Each card shows the texture size, the imagery zoom level, the metres per pixel, and roughly how long a new area takes to load. See Settings › Quality for a comparison.
Not sure? Click Test my connection (it says Test again if you have tested before). OrthoStreamXP downloads real pictures for about 30 seconds, then:
- marks the quality your connection can keep up with as Recommended, and selects it for you;
- sets how many downloads run at once.
Internet speed changes during the day, so you can repeat the test later in Settings › Pictures and download.
6. Ready
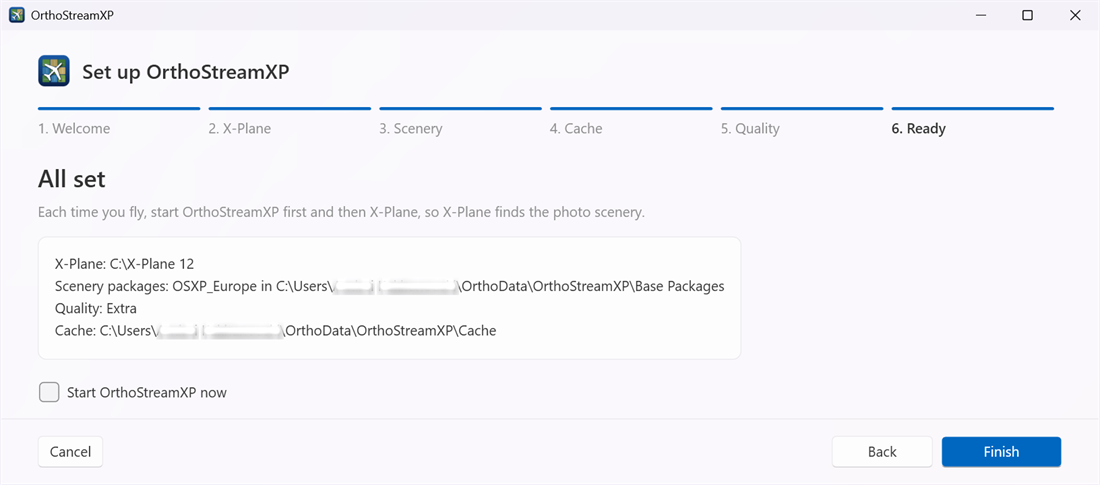
This step summarises your choices: the X-Plane folder, the scenery packages, the quality and the cache folder. Tick Start OrthoStreamXP now if you want to fly straight away, then click Finish.
Next: Flying